.
Hipstamatic. “A must have” App. 
..
Hipstamatic is a paying App but very affordable. (1,59 euros in Europe)
It´s the first Photo App every “Iger” should have before starting his own Instagram carrier.
This app really provides you great pics aspects, big fun and then deep artistic self-satifaction.
#Hipstamatic is according to some “bots” one of Top 10 Hashtag in Instagram Photos Applications.
Hipstamatic was one of the first app launched in the market. The app offered what every Iphone users were waiting for. A simple Iphone Photo App with amazing results.
The Hipstamatic App can appear very simple at first sight but in fact it´s a very complete app and you will need quite a long time to handle it perfectly. I try to give your here some tips.
.
How Hipstamatic works? 
.
It’s an easy understandable app and you can start very fast with it and have soon very attractive results.
However, there is some tips you may know to improve the results.
.
The First step. Let´s open the app.
.
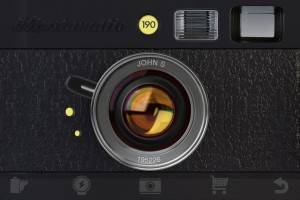
When you open the app for the first time, you may feel a little bit lost and trying to find out the meaning of all the buttons.
Nevertheless, you will understand quickly about how it goes. The “look and feel” will remind you an old camera´s design and the pics will not deceive you.
Open the App. After few seconds, camera will be ready to take pics.
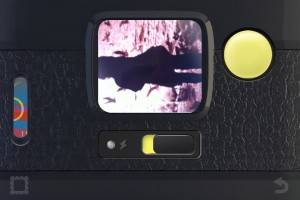
You will have to focus through the smallest viewer you will ever find in any Photo Apps!
Creators probably wanted to reproduce an old camera user experience.
You will have quite no idea of what you are focusing and no idea of what will be the final result.
However you will see, It’s very easy to take Pics and have a good final aspect without having to use to many filters.
When flipping to the rear part, you will find 4 o 5 main buttons.
– A “Flash On” button.
– A big yellow button to take pics.
– In a small corner you will access to your photos gallery roll.
– Through a small window you will see which kind of films your are using.
You will be able to take a pic right away. The app has already a default configuration.
..
The second step. Choose a lense and a film. 
.
This basic app has a limited range of effects as it reproduces old camera pic styles.
The range of effects seems to be limited but really it isn´t!
If you take in account that you have different configurations available by mixing different choices. In the first use you will front some problems in handling it well. Here some tips.
– Change of pic definition and quality.
Close to the central lens you will find a small handle that you may slide if you want to increase or decrease pic quality. My personal advice is to use the best quality but remember it will mean a longer revealing process.
Addenda: In last update, Hipstamatic offers the possibility to take 9 pics without waiting for the revealing process end.
– Change of Lens.
This is probably the most complicate feature to find out. The lens type can be changed by slipping your finger on it. There is three kind of basic lenses. John S, Jimmy and Kaimal Mark II lens.
You may increase the number of lenses by upgrading the app buying “premium” extras packs.
– Change of Films.
I spent almost ten minutes to understand I could change the film. By gliding simply the finger on the film selection!
You will find 3 basic options of films by default. Blanko Film (traditional BW film), Ina´s 1969 (color) and Kodot XGrizzled. And once again many “extra” films.
– Flashes.
You will find three basic flashes included on the app, on a range of 7 flashes. These flashes allows you mainly to change color effects on dark pics.
– Extras.
You can choose new kind of Camera Box and change it to white one (premium) but really I think it´s not necessary.
– Pics Viewer.
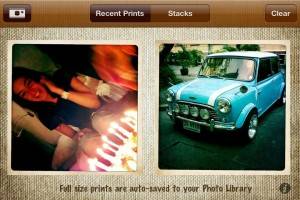
By taping the “Pic Gallery button” you will access to all the roll of Pics. 
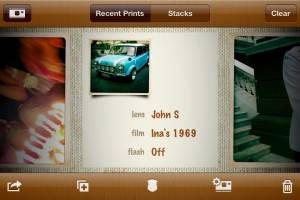
In this pic roll, you will have the possibility to see all the pics you have done and know which parameters you´ve used for each of them, by simply flipping the pic. (see picture)
.
How to buy extra packs?
.
The easiest way to understand the all offer of packs is to look to the “basket” area (below the lense) that explains clearly different packs and equipments included in each version.
Each time you buy a complementary pack (premium paying) you can add a lens and many flashes and one film.
For example, “Williamsburg Starter HipstaPak” includes Helga Viking Lens, Cadet Blue Gel Flash, RedEye Gel Flash, Laser Lemon Flash and Pistil Film.
.
Recommender for. 
.
I wouldn´t recommend this app to take pics with a lot of movement because of the bad results you may have.
It may be used to take small group of people, two or three people very close to the camera and with lot of light.
In parties and meetings with friends, i would recommend small group.
Definitely not for large group of people as you will have lot of difficulties to focus with the limited “viewer”.
Once I forgot someone in a group pic!
I was proud of the result but there was someone missing!
I had good results with monuments and town views. I let you here some pics of a recent trip to Thailand. Bangkok and Ray Leh Beach close to Pukhet.
.
Tips. 
.
My best options are using John S lens (included) and Ina 1969 Film (included) but as I said before, you have many more possibilities and you can buy extra options through Applestore.
I would recommend you to take 10-15 minutes and take the same picture using different combinations of Lens/Film and then find out the 2 or 3 configurations or options you prefer.
Be careful! If you let the app open, the parameters may change. It´s better to fix the configuration each time you start a new serie of pictures and be sure of the parameters you prefer!
Addenda:
Hipstamatic gives for free a new premium pack only until February, 17th. If you want to download this pack (AC & Milk Fashion Freepack) you will have only to register to Hipstamatic through the App.
Hope you will find it helpful.
@philgonzalez


